Content is the magnet that attract customer in the current marketing world. So, learning to add categories on WordPress blog is good for content accessibility.
Category is the act of grouping similar posts under a broad topic.
These categories can be placed on your website either at the top of post or bottom of post. It can also be on the sidebar with the help of widget or plugin. All these depend on the template installed.
For instance, this post is grouped under blog setup category because it is an extension of setting up a WordPress blog; what you need to do to have successful website on WordPress CMS that have the capacity to attract millions of customer.
Why it is important to add category to your post
# Category allows user/visitors to quickly navigate to the content they want.
# It makes your website compact and neat.
# It also makes relevancy more efficient from both SEO and audience point of view.
# It make content search much easier and simple.
# Above all, it makes your website user friendly.
How to add category
There are basically three ways by which categories can be created on WordPress blog.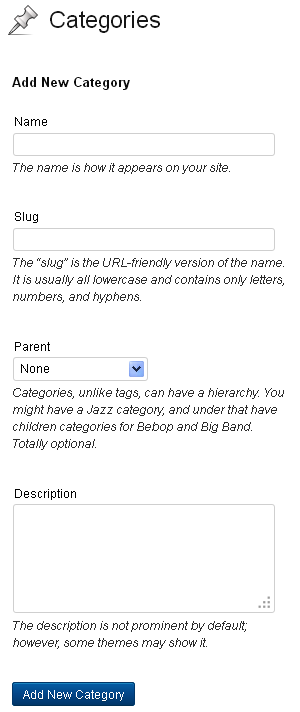
# From the dashboard
# On the Post Editor page
# Tags to Category converter
1. Adding category from the dashboard
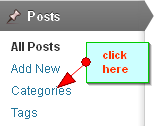 You’ll need to log in to your admin panel. On the menu by the left, navigate to Post.
Place your cursor on it and click on category from the drop down menu. On the categories page, go to Add New Category.
Type the name of your category in the box provided. This is the name that will appear on your site and on the post URL assigned to it. This depends on your permalink structure.
Category can have hierarchy though it’s optional. On the parent option, choose the hierarchy for the category you are about to create.
You may leave at none if you want to make it the main category and not a sub-category.
On the description box, you can concisely describe what the category is all about.
This is optional too and most templates don’t show it on the front end.
Click on Add New category and the category is created.
2. Adding category from the Post Editor page
 On the admin dashboard, go to Post and click on Add New.
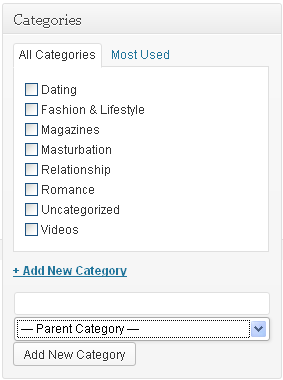
On the post editor that emerge, navigate to the right menu below the Publish button, you’ll see Categories menu.
The box contain list of all categories, Most Used categories and link to Add New Category.
To add a new category, simply click on Add New Category at the bottom of categories box. A little box will appear.
Type the name of the category you want to create inside the box, assign hierarchy if you want and then click Add New Category.
The category would be added automatically to the list of categories with the box against it checked ready to be used for the post about to be created.
This is how to quickly assign category to post if the one you intent to use is not on the list created.
3. Adding category by converting tags to categories
 Tags are similar to categories by the way they group content, but different in the way they offer more specific details to post.
However, it is possible to convert tag to category if you feel like doing so.
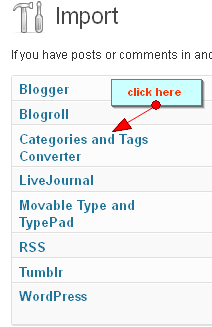
To do this, go to Post on dashboard and click on Tags.
At the bottom of the tabulated box, you’ll see tags to categories converter link. Click on it. On the new page, scroll down to Category to tag converter. Click it to install and activate the plugin. Click on convert tags to categories from the options provided at the top. Select the tags you want to convert by checking the box against each tag name.
Click on Convert to category.
How to manage your categories
On WordPress, it is possible to have a comprehensive view in tabulated format all the categories you’ve created and the number of pots attached to each one on your website. Apart from this, there are links embedded through which you can effectively manage existing categories.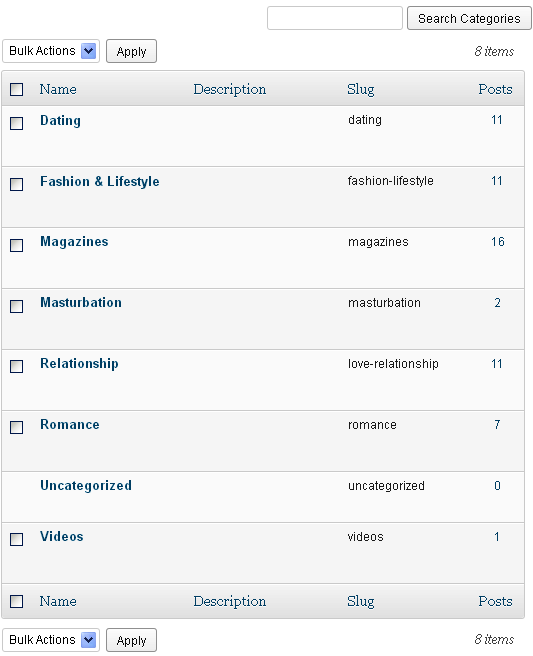
To access this page, you’ll have to go to admin dashboard and scroll to Post. Click on Categories. You’ll see the table that contains category archives. To edit a category, mouse-over the category name. This would reveal hidden menus like Edit, Quick edit, Delete and View. Click on the action you want to perform. For instance;
To edit category: Click on Edit. The new page will contain all the parameters for adding new category from dashboard as discussed previously i.e., you can change the name, slug, parent and description of the category already created. Click on update to effect changes.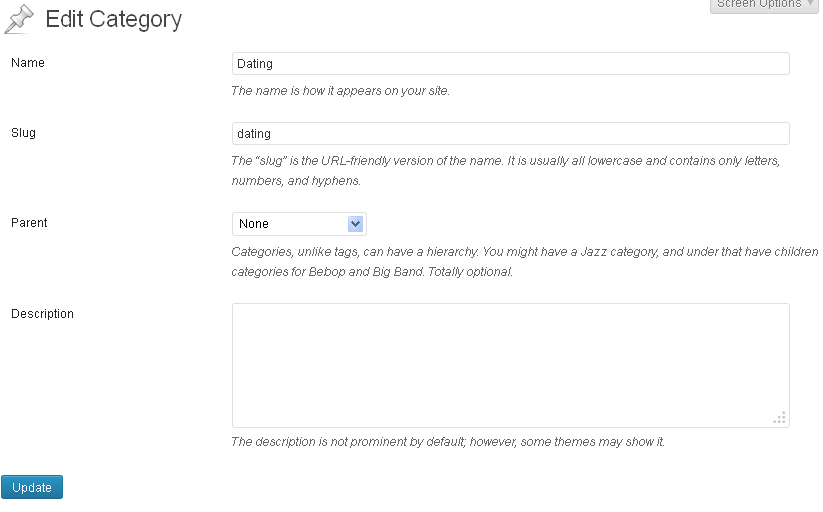
To quickly update a category; Click on Quick edit. It would show box that contain the name and slug of that category. Change them to what you want and click on update.
To delete category; Click on delete under the category name and confirm the action on the pop up box. For bulk delete action, you either check the small box beside each category name or check the small box at the top if you want to delete the entire category on that page. Click the arrow beside Bulk action at the top and select delete from the options. Click on Apply.
Watch a video on creating categories on WordPress
It is expedient to note that when a category is deleted, the posts assigned to it will not be deleted, rather they are moved automatically to default category usually called uncategorized or General depending on the theme installed. It may be wise to move posts under the category you want to delete to a new one.
Over to you now. Was this helpful or you’d like to add more tips?
- How to Add Post Thumbnail Image to RSS Feed on WordPress - February 16, 2016
- 10 Tips for Getting the Most out of Google Image Search - January 19, 2016
- How to Add Next and Previous Post Links with Thumbnail - January 11, 2016