
One of the best ways to reduce website developmental time and speed up website maintenance process in terms of file transfer is to use FTP clients like Filezilla.
The File manager offered on cpanel that helps you with file management on your web hosting server is good, but could be limited in the amount of files it can transfer par time before it disconnects.
Then, the process of connecting to it is somewhat longer than it is to connect to Filezilla.
Apart from these, Filezilla is absolutely free and it lives right on your computer desktop. So, you can access it anytime you need it.
However, you also need an internet connection to access files on your website as much as you needed it to log into your file manager via cpanel.
The beauty of Filezilla is that it places all the files on your local computer side by side with the folders on the website (Remote server) you connect it with. This makes it a lot easier to locate and transfer files without stress on both ends.
If you want to ease the stress of uploading and downloading files within your website, then you really need to install Filezilla on your computer.
How to install Filezilla server on your computer
I’ll be taking you through how to install Filezilla FTP server on windows 7 because that’s the system I use currently (I always want to take you through what I’ve tried and tested).
Now, you’ll have to go to Filezilla website and download the actual version that can work with your system. What I noticed is that when you click the link to visit Filezilla download page, it would automatically take you to the version that is meant for your computer operating system.
However, you may click on the ‘Show additional download options‘ link below the highlighted download button to select the available alternative versions of other systems.
For me, I clicked the prominent download button because that one was okay for my kind of windows OS.
Go to your computer files and locate the Filezilla software you’ve just downloaded. Usually, it should be in the download folder.
Double click it so that windows will prompt the process of installation.
Windows might want you to confirm the installation. Click on ‘Allow‘ to continue.
The next page should prompt you to download the actual Filezilla setup file from SourceForge. The file is about 6.5MB.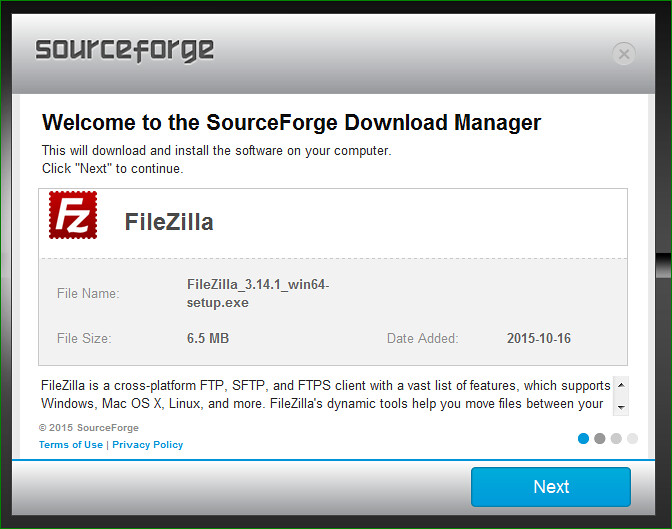
Click the ‘Next‘ button to continue.
Accept the end user license agreement and privacy policy.
You might be prompted to install Opera browser. You can still delete it later through your Control Panel. Click on ‘Accept‘ button to continue.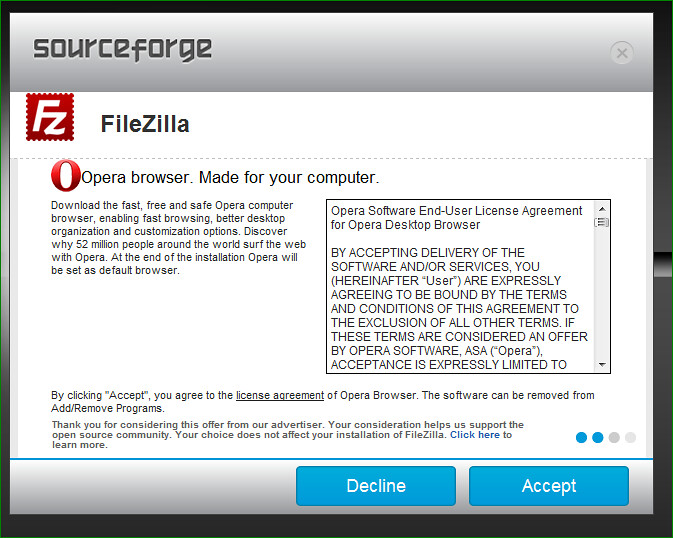
The next page will show the download progress bar. Allow some time for the download to complete.
When the download is complete, you’ll see a ‘Thank You‘ dialog box informing you that Filezilla download was successful.
Click the ‘Open‘ button.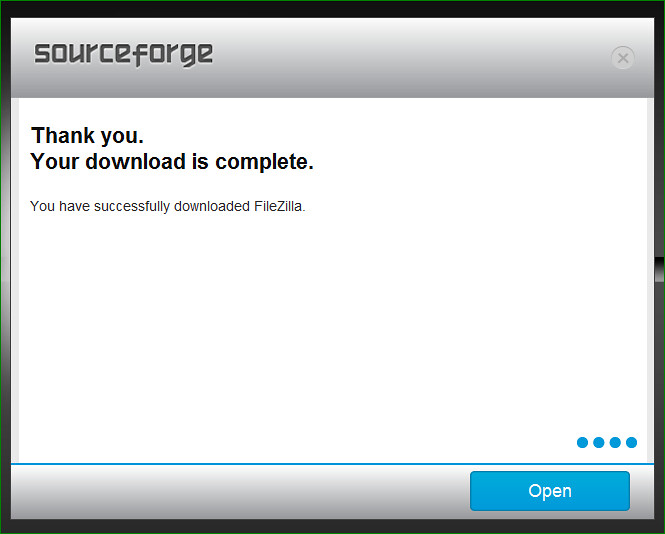
Windows will prompt you to confirm the installation again. Click on ‘Run‘ to continue the installation process.
Click on ‘I Agree‘ on the next page.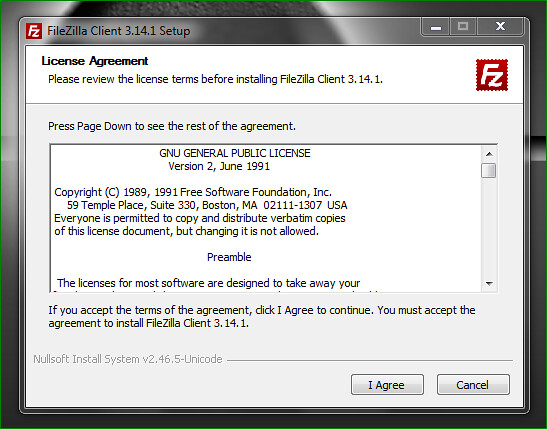
Choose the folder you want to install Filezilla by clicking the ‘Browse‘ button. Otherwise, it would be installed in the Program file.
Click on ‘Next’, to progress to the next stage.
Specify users that can have access to the tool by checking the appropriate radio button. You have two options; either you or anyone that have access to the computer.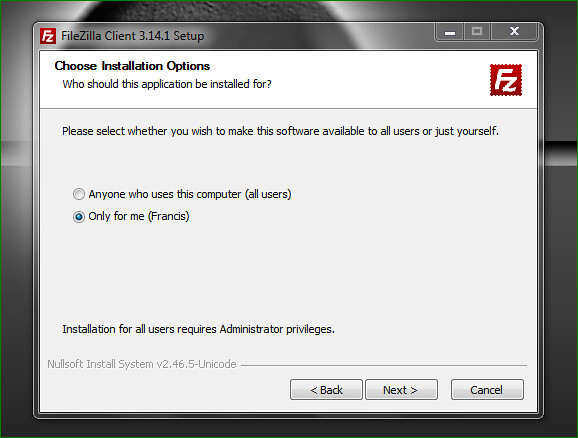
Choose the features you want to install by checking the appropriate boxes.
Click ‘Install‘ to create ‘Filezilla client’ as a shortcut on desktop. You may check the ‘Do not create shortcut‘ box at the base of feature options box.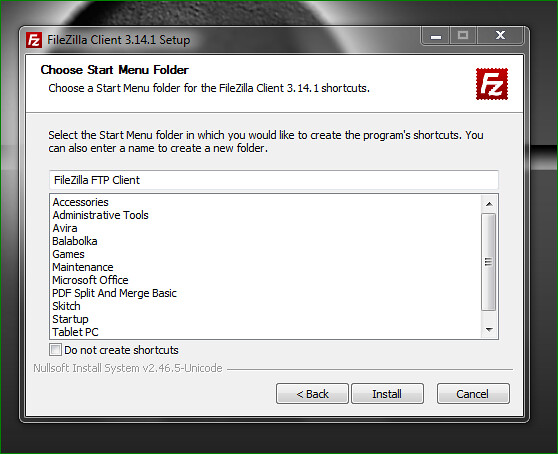
The next stage would show the installation progress bar which would terminate on another page that indicates Filezilla has been installed.
If you want to launch Filezilla tool immediately, click the ‘Finish‘ button otherwise, uncheck the box that reads ‘Start Filezilla now‘ before you click on the finish button.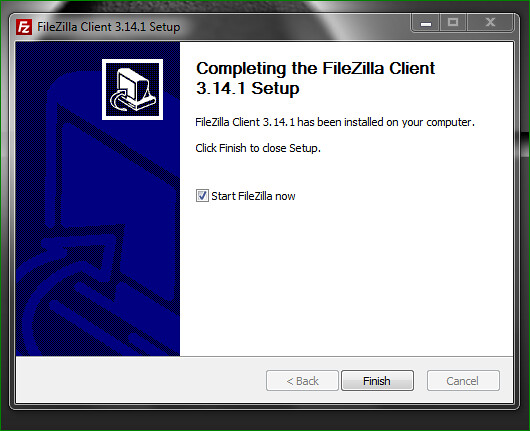
Let’s assume you launched Filezilla immediately you clicked on the ‘Finish’ button, you’ll see all the files and folders on your computer on the left side. The right side column will still be empty because you have not yet connected Filezilla to your website (remote server).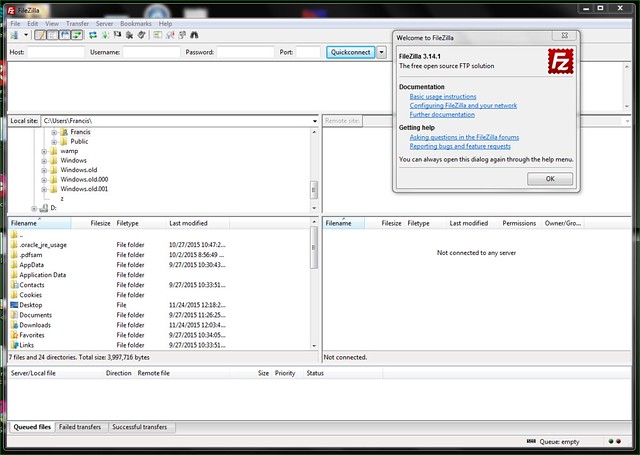
These are all you need to do to install Filezilla FTP client on your windows 7 computer.
You may watch the video on how to setup Filezilla FTP program
Let’s go on to how you can use it to manage your website even better and easier than how File manager does it on cpanel.
How to use Filezilla FTP client to manage your website
I hope you where able to see all the files on your computer on the left side of Filezilla. Now, how do you view the files on your website that are supposed to be on the right side?
The answer to this question is to connect Filezilla to your web server. There are two ways by which you can get this done.
Quick connection
Go to the top header of Filezilla and type the URL of the site you want to connect in the ‘Host‘ field.
On the ‘Username‘ field, type the username you use to log into your cpanel.
Type the password into the field for ‘Password‘.
Type ’21’ into the ‘Port‘ field. (Note: the default port for FTP is 21 while SFTP is 22).
Click on ‘Quickconnect‘ button.
You’ll see the files on your website (remote server) populated on the boxes on the right column.
The downside of this type of connection is that you’ll have to keep repeating this connection process every time you want to access your remote server.
Normal connection
Go to ‘File‘ at the top header.
Click on ‘Site manager‘.
On the dialog box that emerges, click on ‘New site‘ at the bottom left of the box.
Look at the top right, you should see the new site you just created. Rename it to whatever you want for easy identification.
On the left side of the box, enter the ‘Host‘ name. The host name is either the URL of your site or the IP address.
Type ’21’ on the ‘Port‘ field. (21 for FTP and 22 for SFTP).
On the ‘Protocol‘ field, specify the type of FTP.
Leave the ‘Encryption‘ field at default.
Select ‘Normal’ on the ‘Logon Type‘ field.
Enter your cpanel username into the field for ‘Username‘.
Also enter the password on your cpanel on the ‘Password‘ field.
Leave other settings at default.
Click on ‘Connect‘ button to connect immediately or click ‘Ok‘ to save your inputs.
The advantage of this method is that apart from the fact that you can add multiple websites, you don’t have to type in the connection credentials each time you want to reconnect to your remote server unlike the quick connect method above.
Now that you’ve successfully connected to your website server, let’s start the transfer process.
How to use Filezilla to manage your website
There is virtually nothing you can do on ‘File manager’ on cpanel that you cannot do better with Filezilla. Let’s look at some of the most important things you can do on Filezilla as it relates to your website management.
1. View/Edit files: To do this, just left click on the file you want to view or edit and then click View/Edit among the available option menu.
The file will open automatically in notepad editor. You can then start editing the file. At the point of saving the edited file, you’ll be prompted to save a copy on your local file before uploading to your remote server automatically.
2. Download files: You can download files from your site to your local computer by left click on the file and then click on ‘Download’. Follow the prompt and that’s all.
3. Add files to queue: You can queue up files to be transferred at specified time. I doubt if File manager has this feature.
4. Create directory: You can also create new directories.
5. Delete files: You can use Filezilla to delete unwanted files from your site.
6. Rename files: You can rename files.
7. File permission: You can set file permission for specific users on your site right from Filezilla.
8. Upload: You can upload files or folders from your local files to any folder on your remote server even through drag & drop mode.
Just ensure you drop files into the actual folders you want them to be.
You can see that what File manager will do, Filezilla can do even better and faster.
One thing I noticed is that Filezilla may timeout frequently during the process of connecting to the remote server.
To resolve this issue, simply go to ‘Edit‘.
Click on ‘Settings‘.
On the right column box, change the default value (20 seconds) to a value you feel you can work with.
Click on ‘OK‘ and that would be all about that.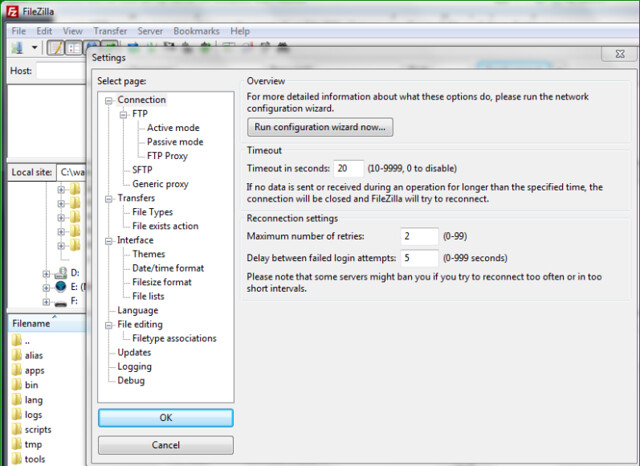
Conclusion: Filezilla is a must-have tool if you maintain or update your site frequently. It will reduce the time spent on accessing your server and speed up file transfer processes especially when you manage many sites. Bulky files would no longer be a threat to your site.
On top of that, the software is free, frequently updated and it lives right on your desktop. All you need is an internet connection whenever you want to connect to your website (remote server).
Won’t you rather make your job easier by installing Filezilla FTP client on your system?
- How to Add Post Thumbnail Image to RSS Feed on WordPress - February 16, 2016
- 10 Tips for Getting the Most out of Google Image Search - January 19, 2016
- How to Add Next and Previous Post Links with Thumbnail - January 11, 2016