
One of the ways to boost user experience and enhance blog navigation path is to add next and previous post links with thumbnail on your blog post.
This can increase page view and of course reduce bounce rate significantly especially when the title of your content are well crafted from readers perspective.
The thumbnail (featured image) attached could further enhance the CTR of the post if they are unique and resonate with the content or post title.
However, you need to know how to add this module (next and previous links) to your blog the right way.
Not only will I take you on how to implement it, but I’ll also walk you through how to style it with simple css so that it blends with the overall aesthetics of your site.
In this tutorial, I’ll be using the exact procedure we adopted in adding it on this website. You may scroll down to the bottom of this page below the comment form to see the links in action.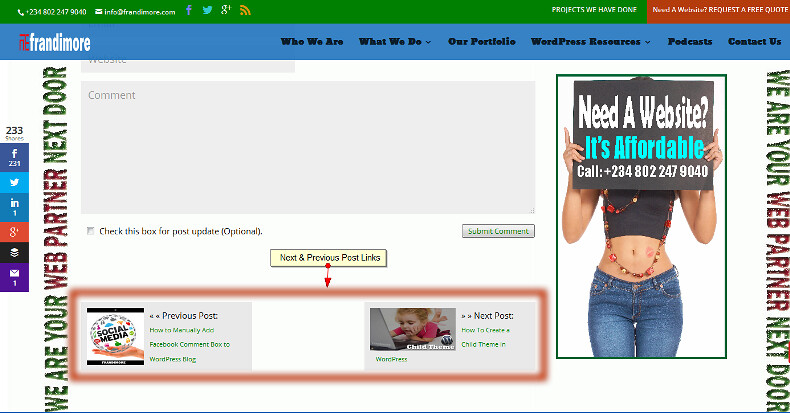
Note: These links are only visible on our blog on any screen device above 800 pixels. We set it that way deliberately. I’ll tell you why later.
Okay, let me show you how we did it on this site.
How we added next and previous post links with thumbnail on this blog
There is a plugin I came across that can do this, but the plugin has not been updated for some time now.
Out-dated plugin or plugin that has not been updated for more than 2 years may not only be effective, but has the tendency to break your site.
Then, we want to avoid plugin conflict as much as possible. So, we do not want to add another plugin to the ones we have. The only logical option left for us is to go the code way which is better and more reliable if you ask me.
The only thing you should be mindful of when editing files on your site is how to keep every custom code added to your theme.
The escape route is to perform every customization work on a child theme.
Also ensure you back-up your site. In an event of any eventualities, you’ll be able to restore your site to where you left it before editing.
These are the background work you’ll need to do before trying out the prompts (DIY) on this tutorial. Apart from this, those two inputs (child theme and site backup) should naturally form part of your site maintenance process.
Taking about the code, we modified a little further the code we found on this page by itsbarry. The code on the support WordPress support page is not really correct because it contained ‘{‘ and ‘}’ signs that are not suppose to be there.
Apart from that, we also included the forward and backward signs with their corresponding text on the navigation links.
Great! Now let’s start in earnest.
We shall be working basically on the single.php file. If your child theme does not have this file present in it, you need to create it there and then copy and paste all the content of the parent theme’s single.php into it.
Read our guide on how to create child theme in WordPress for details.
Before you save the file, copy the code below and paste it where you want the next/previous post links with thumbnail to appear.
<div id="post-nav" class="navigation">
<?php $prevPost = get_previous_post(true);
if($prevPost) ?>
<div class="nav-box previous">
<?php previous_post_link('« « Previous Post:', 'yes'); ?>
<?php $prevthumbnail = get_the_post_thumbnail($prevPost->ID, array(100,100) );?>
<?php previous_post_link('%link',"$prevthumbnail <p>%title</p>", TRUE); ?>
</div>
<?php $nextPost = get_next_post(true);
if($nextPost) ?>
<div class="nav-box next" style="float:right;">
<?php previous_post_link('» » Next Post:', 'yes'); ?>
<?php $nextthumbnail = get_the_post_thumbnail($nextPost->ID, array(150,100) ); ?>
<?php next_post_link('%link',"$nextthumbnail <p>%title</p>", TRUE); ?>
</div>
<?php ?>
</div><!--#post-nav div -->
You need to understand where WordPress loop starts and end for specific tags for you to place this code correctly.
For us, we place it after the comment box. We put it there because we wanted to give you (our blog readers) another reason to read more articles on our blog.
We feel it would be counter-intuitive to place it directly below the content since the related posts that occupied the space are more compelling to you.
Okay, save the file when you’re done with the placement.
The style sheet (CSS)
The above code would look dump (shapeless) without a CSS that would make it look appealing. For this reason, we created an ‘id’ called ‘post-nav’ that would be used to call the styling function within the code.
Below is the CSS (cascading stylesheets) we used to make it look like the one you saw on this page below the comment form.
#post-nav{clear: both; height: 100px; margin: 0 0 70px;}
#post-nav .nav-box{background: #e9e9e9; padding: 10px;}
#post-nav img{float: left; margin: 0 10px 0 0;}
#post-nav p{margin: 0 10px; font-size: 11px; vertical-align: middle;}
#post-nav .previous{float: left; vertical-align: middle; width: 300px; height: 120px;}
#post-nav .next{float: right; width: 300px; height: 120px;}
Feel free to change the style formation to suite your theme. But you need to know a little of CSS.
However, if your theme is responsive, you might want to either hide this next/previous module or restyle it to suite mobile screen size.
For us, we simply disabled it with the code below.
@media all and ( max-width: 800px ){
#post-nav {
display: none !important;
}
}
We did that because there are related posts that are more compelling below our blog post.
And then, people that surf the net on mobile phone are ‘on-the-go’ hence they might not really have the time to dig deep or scroll that long to see next/previous links on our site.
Nevertheless, you need to understudy your audience through A/B split test in order to know exactly how they consume your content so as to know the best way to serve them better.
Conclusion: You can see that it’s really simple to add these next and previous post links with thumbnail on your WordPress website. Not only that, you have the option to make it look the way you want using css.
Knowing how to implement these links on your site is not as important as understanding where to place it and why you need it on your site.
Yes, I know it can reduce bounce rate and increase page view which are both good signal for SEO that can boost your site exposure on SERPs like Google.
Beyond that, you need to understand your audience well enough to determine the best way to serve them with modules like this. What do you think?
- How to Add Post Thumbnail Image to RSS Feed on WordPress - February 16, 2016
- 10 Tips for Getting the Most out of Google Image Search - January 19, 2016
- How to Add Next and Previous Post Links with Thumbnail - January 11, 2016