It is very simple and easy to create a Facebook page, but it takes a creative mind to optimize it as a source of traffic to website it was intended to serve. Yes, to drive traffic to your website or blog.
Facebook page is not like a personal profile account rather it is a platform specifically designed to relate with clients and fans with the intent of pulling unique online community while building a brand. It is necessary to know why Facebook page is important and how it is different from other account platforms.
Another Facebook platform that has close similarity is Facebook group but different in terms of functionality and available tools.
How then can we create a page in a community of over 1 billion active users that can serve as the medium of traffic to our website? Any website owner, who does not plan to have presence on a social network such as Facebook, is missing out great deal of traffic.
It took me a while to figure out these, because I’d thought Facebook is only meant to connect with friends and loved ones.
However, there are two things that must be done. The first is setting up the page and the other is optimizing it to deliver traffic to website.
Setting up and optimizing Facebook page
Like I said earlier, it’s really simple to setup Facebook page even in the face of Facebook continued change in design and user experience preferences called timeline. It’s free, but you must have a personal profile account to setup and manage it.
All you need to create an account is a free and functional email address like yahoo or Gmail. Follow the steps below to create a Facebook page as website owner.
# Log on to Facebook page: Log on to Facebook page and select Brand or Product from the 6 different cla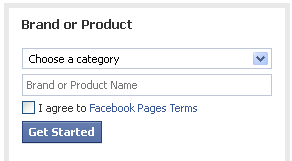 ssification groups. A click on it would prompt you to choose a category and a name for your page. Choose website from the list of drop down option on category.
This would help page rank better for relevant searches and also help Facebook understand your page and therefore provide necessary tools to work with.
Check the box for terms and conditions and then click on Get Started to continue.
# Log in to your personal Facebook account: The next page will provide options for account holder sign in and direct opportunity for new account sign up. The log in information generated here would serve as the admin for the page.
I assume you already have an account on Facebook. Ok, click on I already have a Facebook account and then log in to continue.
You’ll be provided with a form that requires you to fill four different fields- About, Upload profile photo, Vanity URL and Enable Ad. Although, you have the option to skip this stage for later update, but I dare you don’t.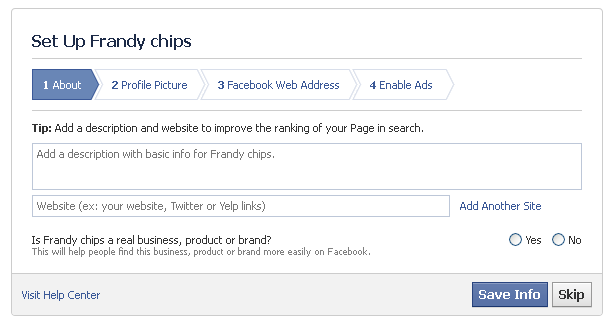
# Optimize About section: This is a big opportunity in the new Facebook timeline design for brands. A concise description of your page of about 165 characters placed in front of your audience.
Optimize it as you would configure post meta description for SEO. Don’t forget to include the link to your website. It always attract high click through rate especially with new fans.
# Upload profile photo: It should be the logo you use on your website. This would aid quick connection. Mark you, this photo will appear beside your status updates, comment, news feed and every activity associated with your page.
The photo size should be 180 by 180 pixel (that is the actual size of profile picture at the base of cover photo), but it would be shrink down automatically to about 125 by 125 on your status update as icon. Ensure the design outlook remain intact even when it shrink down.
# Vanity URL: This is the URL that would be used to access your page directly on any browser whether logged in or not. Type in the name of your page inside the box provided.
This would make it easier for people to remember, e.g. www.facebook.com/tlcbase, where tlcbase is the name of page.
# Enable Ad: Marketing should be all encompassing. So, you may enable Facebook Ad to have access to the platform whenever you plan to run an Ad.
Click continue and the next page will present your admin dashboard where you have so many tools to make your Facebook page a success. Your page is now ready to connect.
But, before you invite people to your page ensure you do the following things.
1. Upload a cover photo: This is your billboard, the sign post that draw in your brand at a glance. The cover photo size dimension is 851 by 315 pixels. From timeline view point, it is a good idea to change this photo periodically.
However, as much as you would like the photo to reflect your brand, there are rules guiding cover photo design. Read Facebook do’s and don’ts before you plan a design or think of uploading one. Inspire your brand creative mind with these samples of branded Facebook page cover photos.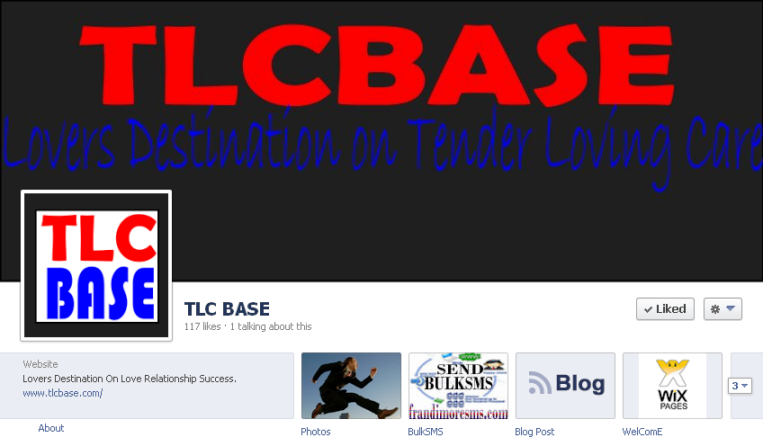
2. Edit page: On the top right just beside Build Audience button, you’ll see Edit Page tab. It gives you full control over the entire page. Click on it and it would bring a drop down of different links to pages you can edit so as to position your Facebook page the way you want it presented.
3. Create custom tabs: Gone are the days of default landing pages where you can force a welcome page on visitor and prompt them to like your page.
Nevertheless, the custom tabs are strategically located on the front page just below the cover photo. The option of branding with an icon and custom name would make audience click on them.
The custom tab are mini pages which allows you to showcase other things that you adjudged important to your fans and brand e.g. subscription, teams, eBook download, RSS feeds, testimonial, survey, etc.
The first 4 tabs appear on the front page while a click on the arrow at the far right is needed to show the next first 4 tabs.
You have control on all the tabs except the photo tab and probably the Like tab in terms of editing. Make sure the most important tabs appear on the front page. The icon size should be 111 by 74 pixels and the content maximum width is 810 pixels.
To setup these tabs, you have to use either Facebook developers or a third party application like Wix, Short Stack, etc.
4. Status update: The content you share and how you share it is the most connecting element that would attract likes, share and comment which would invariably create the desired traffic to your website.
So, ensure you share useful content that can impact your audience positively and use Facebook Insight tools to measure engagement so as to know what is working and what is not. Below are tips to great status update:
a. Be brief and go straight to the point.
b. Share your personal experience and advice.
c. Don’t forget to share news worthy and entertainment updates.
d. Don’t flood your post with links from your website. Use them sparingly, say ratio 1:3.
Otherwise, people would forget to engage with your post on Facebook when they are on your website and that would affect your Edge Rank. You may provide a link back to your page on website like ‘Facebook like box‘.
e. Ensure you post when audience will see it. Timing is important to get the best engagement.
f. Use images and visual stats to connect people with your content.
g. Use highlight and pin tools by clicking on the star or pencil icon at the upper right corner of a published update when you mouse over on it. On the Pin icon, you can pin post to the top, reposition photo, change post date, hide post or delete photo.
Build Audience: It’s time to invite people, friends, and your email list to your newly optimized page.
You’ll see this tool 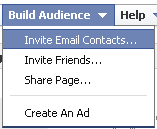 beside the Edit Page button at the right top corner of your page.
These are the basic things you need to do to create a Facebook page that can drive traffic to your website from over 1billion community.
Use your Insight tool to effectively measure engagement and let the inference generated from the data be a guide to how you engage with audience.
What other ways do you think a Facebook page could be created for the purpose of generating traffic to website?
- How to Add Post Thumbnail Image to RSS Feed on WordPress - February 16, 2016
- 10 Tips for Getting the Most out of Google Image Search - January 19, 2016
- How to Add Next and Previous Post Links with Thumbnail - January 11, 2016